有的時候, 會想要在使用ICE製作OS image時, 就先把一些資料檔案, 安裝檔案, APP程式檔案...放入image當中, 等到OS image第一次在系統上安裝起來, 就能在自己設定的路徑下看到事先放入的檔案, 所以今天就要來教大家怎麼做
1. 首先, 先將檔案放進$OEM$ Folder中
先找到Toolkit Database中的 "$OEM$ Folder" (這邊示範都用X86的DS --> DSSP1, 如果是X64, 自動將DSSP1改為DS64SP1)
路徑會在, C:\Program Files (x86)\Windows Embedded Standard 7\DSSP1\$OEM$ Folders
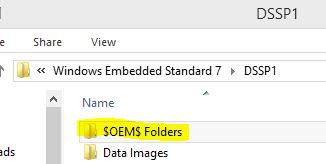
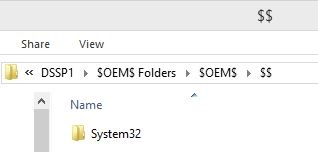
接者在裡面依照以下規則建立資料夾, $OEM$ Folder\$OEM$\$$ or $1\可建立資料夾, 並自行命名資料夾名稱
規則:
當你希望檔案放在OS中的系統槽下(C:), 請使用"$1",
若是希望在C:\Windows 下, 請使用"$$"
例如:
\$OEM$ Folder\$OEM$\$1\MyApp = C:\MyApp
\$OEM$ Folder\$OEM$\$1\MyApp\MyApp.exe = C:\MyApp
\$OEM$ Folder\$OEM$\$$ = C:\Windows
\$OEM$ Folder\$OEM$\$$\System32 = C:\Windows\System32
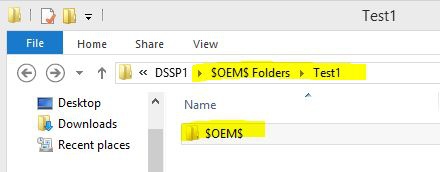
另外如果想要自己設定區分多個資料夾, 可以在$OEM$ Folder 和 $OEM$ 中間多建一個Folder, 自行命名區別
如:
C:\Program Files (x86)\Windows Embedded Standard 7\DSSP1\$OEM$ Folders\Test1
2. 當資料夾內的檔案放好了之後, 就可以回到ICE build image 了
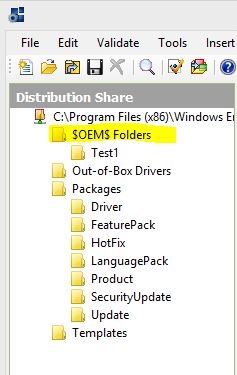
此時, 你會在ICE 的Distribution Share 內看到 $OEM$ Folder 元件, 若有設定資料夾分類, 就會看到分類名稱, 不然就只會看到$OEM$ Folder, 依照自己的分類將此專案需要的設定加入answer file
如: (看自己的設定, 是把Test1 加入answer file 或是整個$OEM$ Folder加入answer file)
其它build image的步驟, 這篇就不多說了, 當把OS image完成後, deploy至target device上, 就可以在Target 裝置上看到自訂的路徑中放入的檔案了
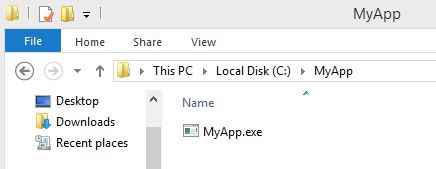
是不是很神奇呢!!


 留言列表
留言列表
